

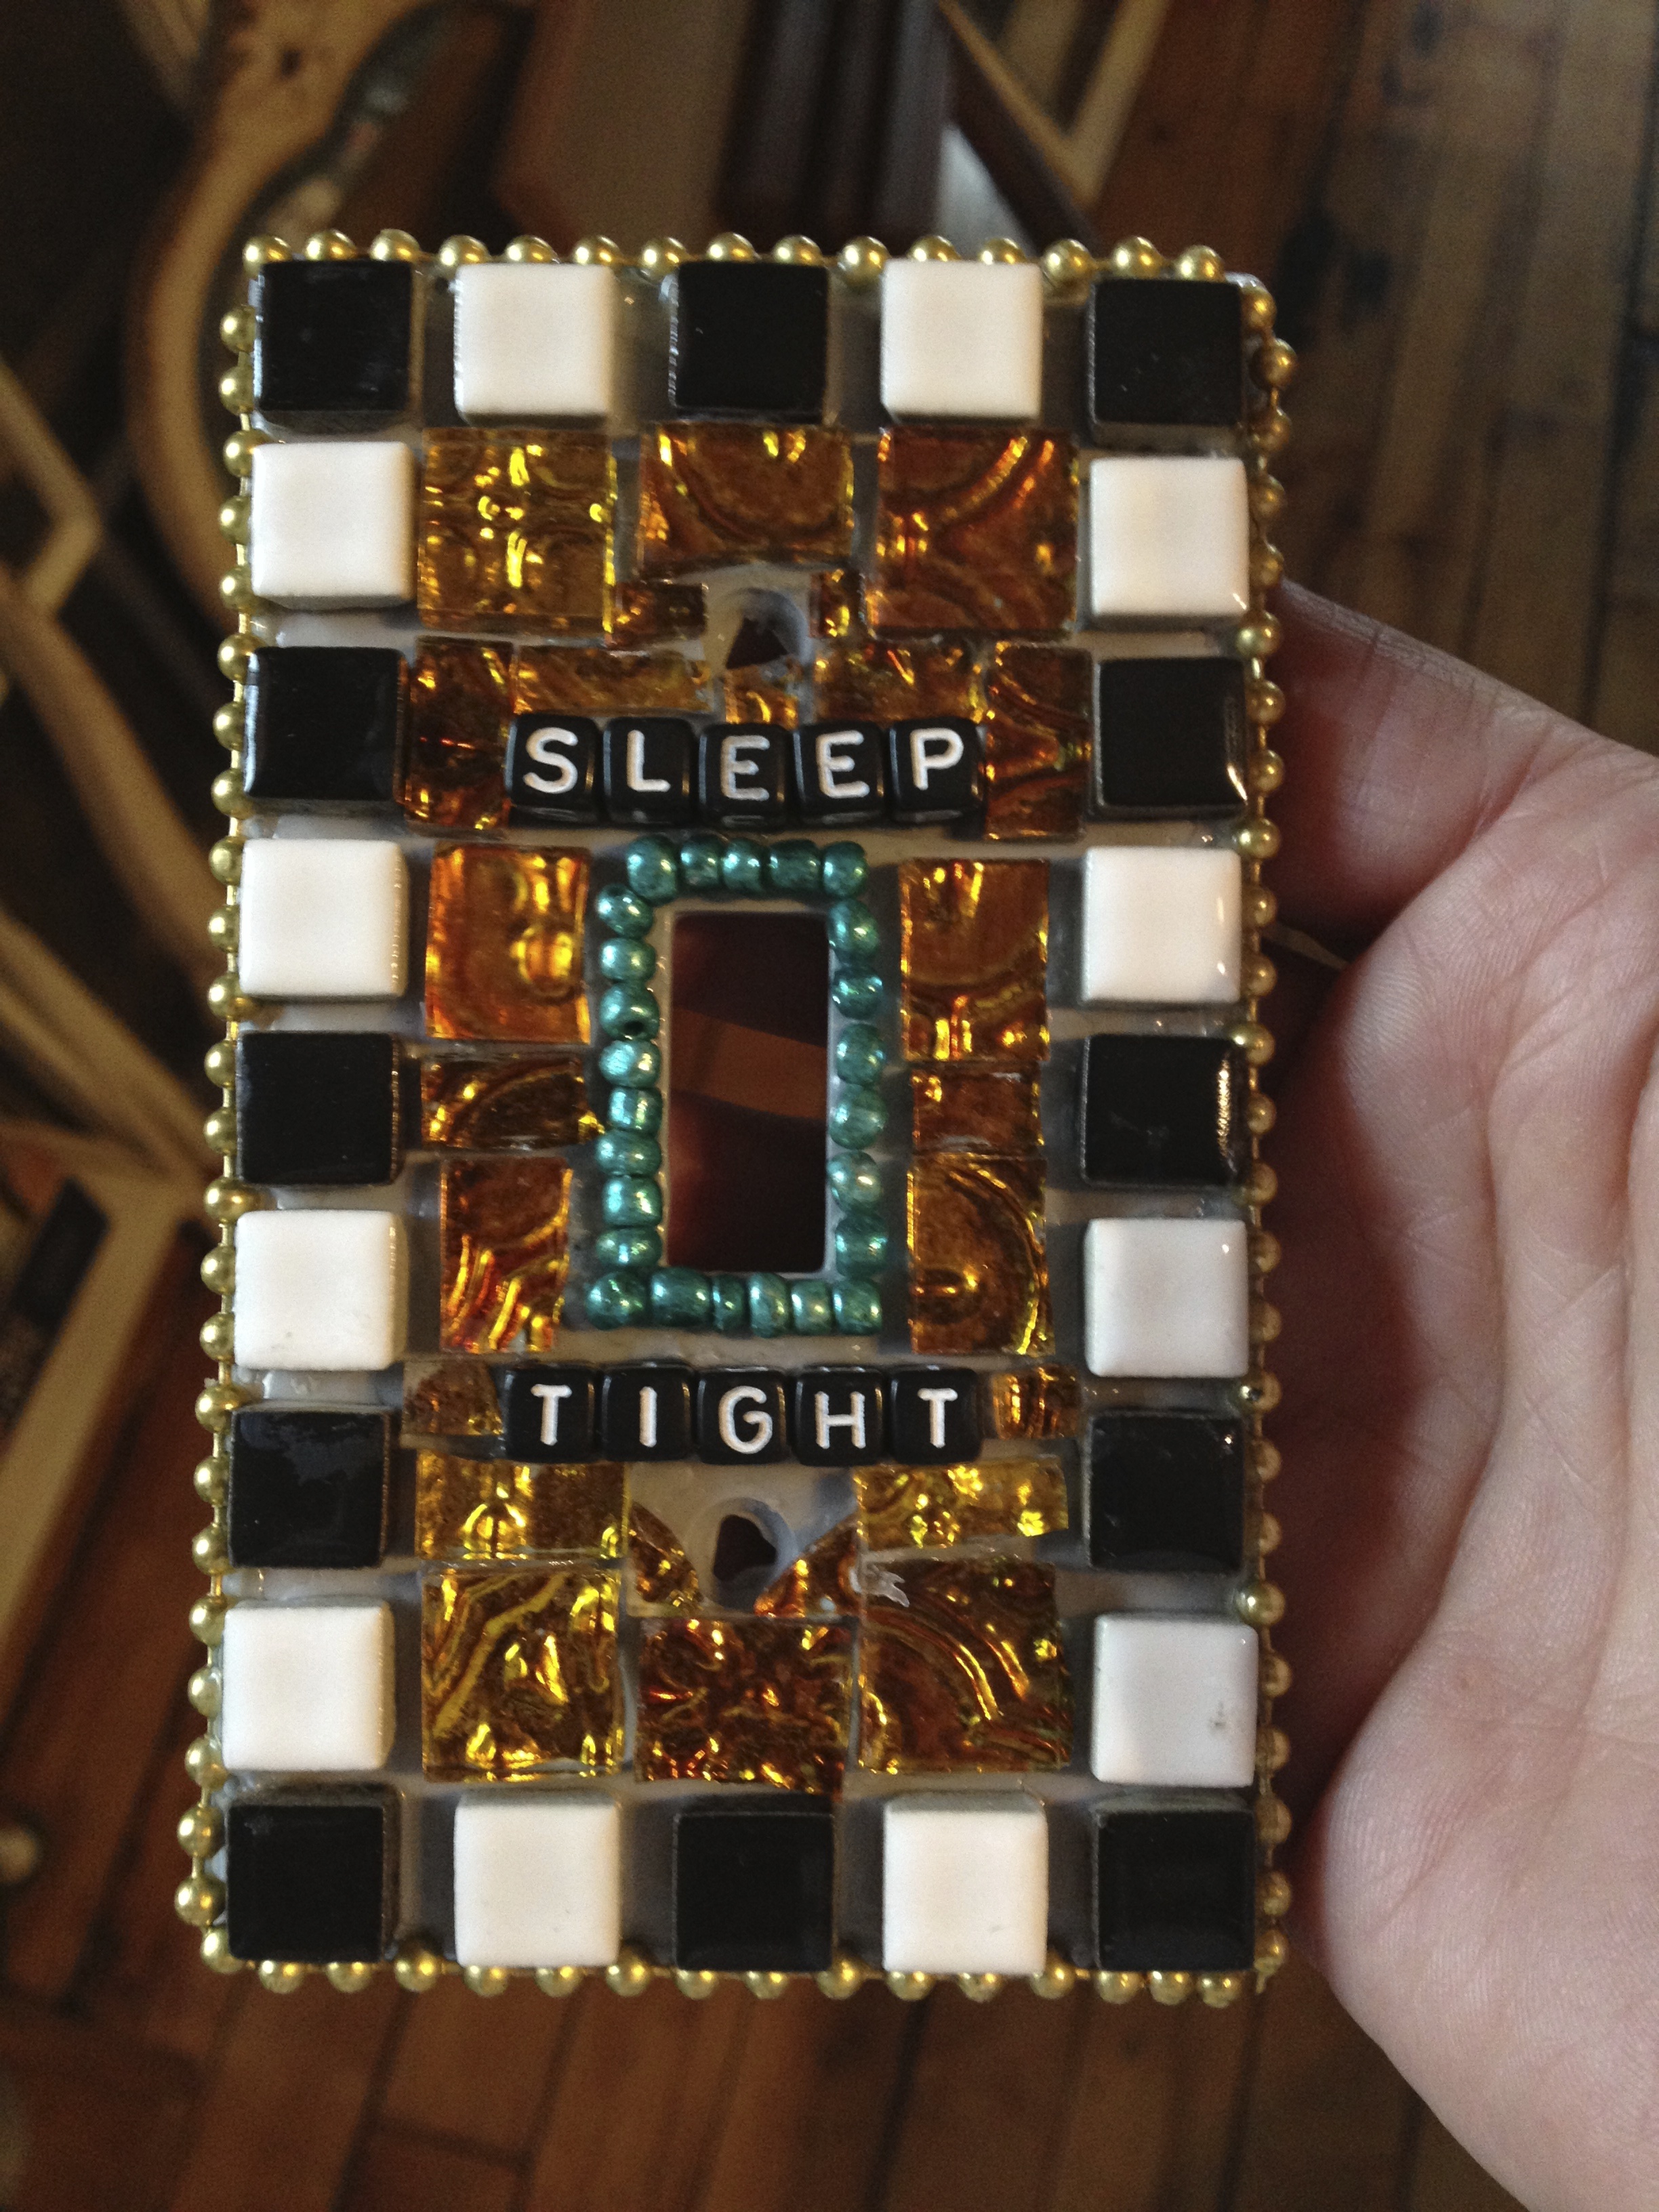
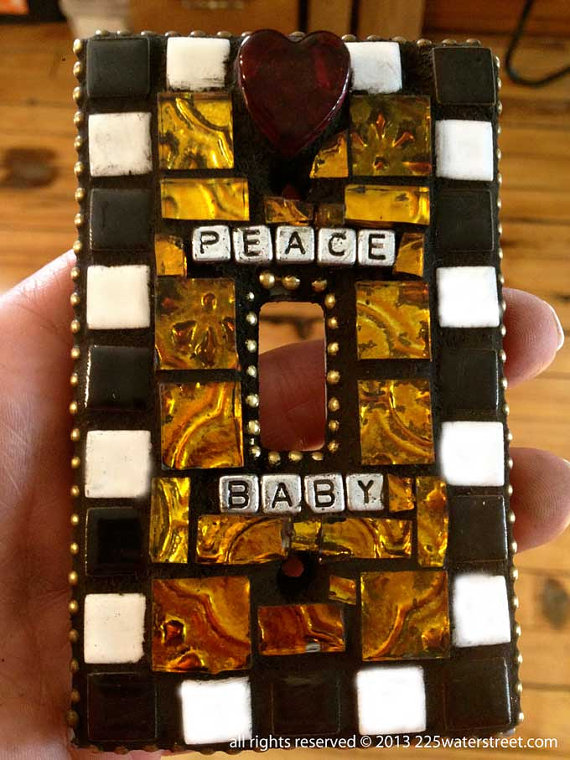
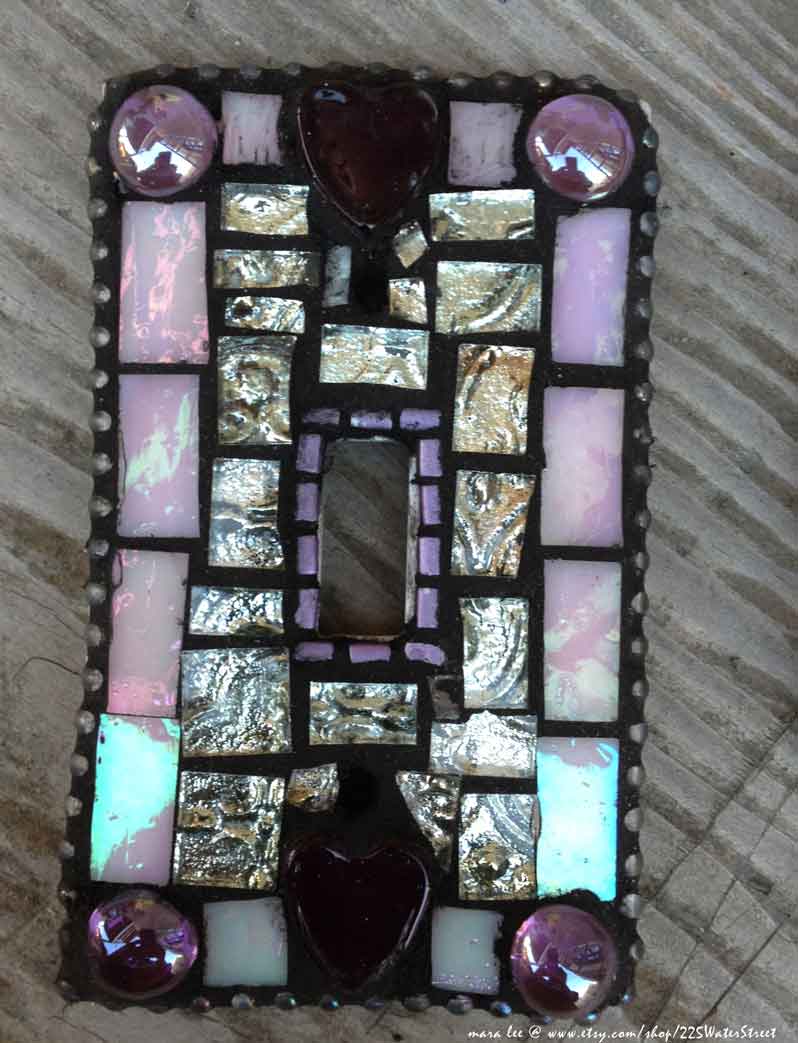
 Creating a mosaic tile switch plate cover @ tilegypsy.com
DIY Light Switch Covers:
- Start with a HARD plastic light switch cover … found at home improvement and hardware stores. If the plastic is bendy … pass.
- You can use wood and metal light switch covers too. Makes no never mind. 😉
- Glue color fast beads and/or tile around the light switch opening with Weldbond.
- Then glue the outside edge to establish how much room you have left (in the middle) to work with.
- Glue the rest of your design and let it dry for a couple of hours.
- Finish by gluing color fast beads – or ball chain – around the outside of the light switch cover. Let dry for a minimum of 24 hours.
- Before grouting cover delicate items (jewels etc) with painter’s tape.
- Confident that the light switch cover is completely dry … mix sanded grout (color of choice) with a liquid grout additive, instead of water, for more flexibility, to an oatmeal consistency.
- Put on gloves … Grout On – I know it’s a weird feeling covering it with mud – keep going filling and smoothing all the nooks and crannies – pause – smooth – pause – 😉 and Grout Off with a slightly damp sponge. Rinse and repeat until clean and smooth. Remove tape from delicate items. Finish gently cleaning and smoothing until shiny and free from grout residue. Let dry overnight. Shine a bit more and gently install.
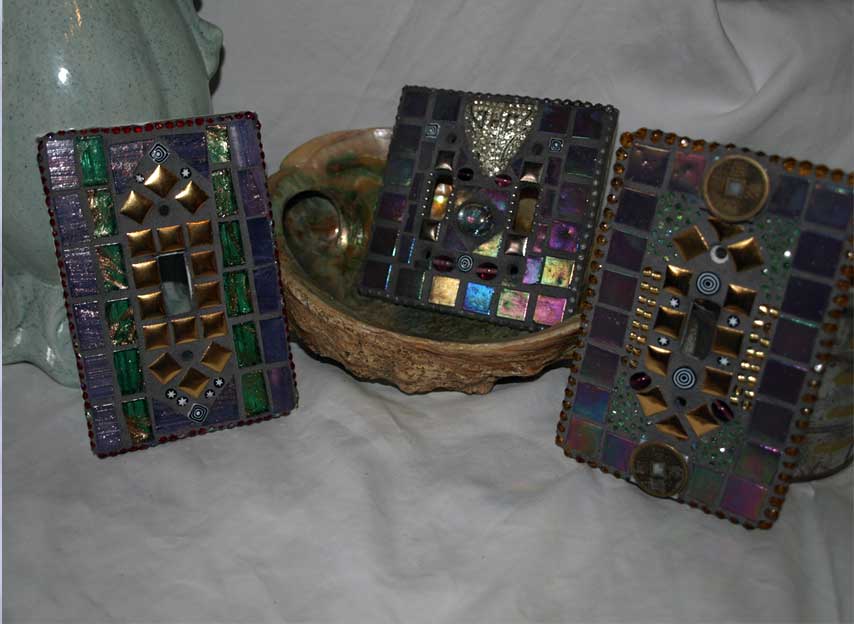
Custom Mosaic Tile Switch Plate Covers • middle and right piece are sold.
MATERIALS:
- Switch plate covers of your choice. Plastic, wood or metal
- Weldbond Adhesive
- Painters Tape
- Wheeled Nipper & Sm Hammer
- Bits and pieces of ceramic tile, china, jewels etc.
- Foam Brush
- Painters Tape
- Wooden Skewer
- Q Tips
- Paper Towel
- Sponge
- Sm Bucket of Water
- Disposable container to mix Grout
- Sanded Grout, Grout Additive and Grout Sealer
- Longer Screws, if needed
 SOLD.
SOLD.


Hi Terri, I glue everything down with Weldbond, let it dry for 24 hours and then grout it. 🙂 glad you found the tile!
These are beautiful! I’ve been looking for the small metal looking square tiles like you show in the middle of several of your designs, but no luck. Any suggestions where to look? Thanks for the inspiration!
TW in Wisconsin
Hi Terri, Sadly, I don’t know where you can buy these tiles anymore. Wish I did!
Hi, I have made mosaic light switch covers in the past. But, after awhile the grout starts to fall off the edges from using the light so much. Do you have any tips to stop this from happening?
Hi, Laura, I have found that gluing color fast metal beads and/or tile around the edges and openings helps to solve this issue … it gives the grout something to hold on to. I would also suggest using a liquid grout additive, instead of tap water, to mix Sanded Grout for better flexibility. Finally … when the grout has dried I seal the grout with grout sealer. You can find bottles of grout additive and grout sealer at many home improvement stores and tile shops. Hope that helps!
I have a question..why coat the plates with welbond first if you are going to glue the pieces in anyways and the other question is how to tape the back of the plate. oh yeah onw other thing…Ive noticed that the edges around the plates have a curve over..they are not completely flat so how do you compensate for this when using flat tiles. Do you not go all the way to the edges with the tiles. Thanks
Hi Theresa,
• Smooth surfaces need to be coated … kind of like sanding wood before you paint it … it prepares the surface to help keep the pieces from sliding off.
• You don’t have to glue things all the way to the edge … you won’t really see the edge once the piece is completed.
• Taping the back is needed before you grout to keep the back of the switch-plate clean.
Mara
http://www.225waterstreet.com
Whenever I imagine doing something like this myself, all I my instincts tell me to crawl under a rock. LOL.